Driveway Sealcoating: The 2026 Complete Guide
Sealcoating is the single most cost-effective maintenance you can perform on an asphalt driveway. Done right, a $200 sealcoat application can add years of service life to a $10,000 paving investment. Done wrong, or skipped entirely, that same driveway cracks apart in half the time. This guide covers every variable that matters: product chemistry, correct application technique, real-world pricing, and the mistakes that waste your money.

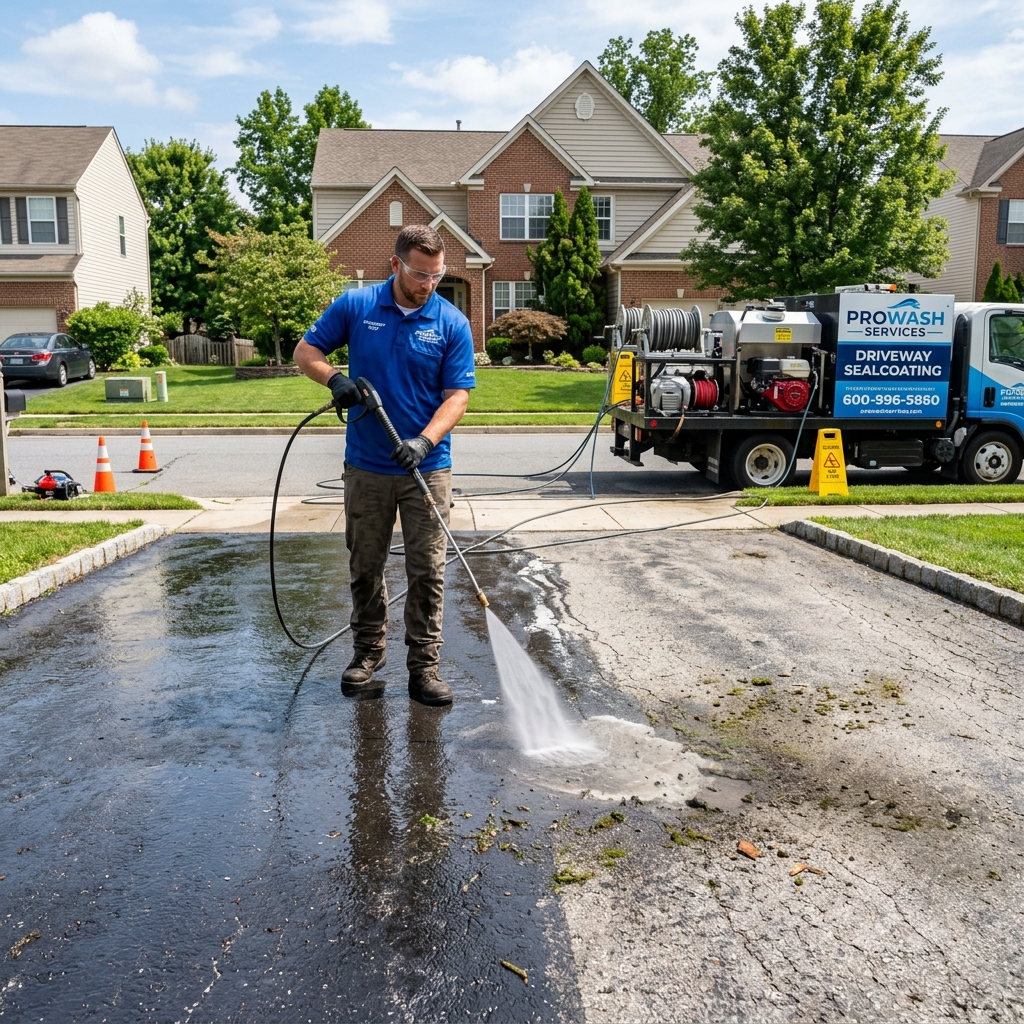
Professional sealcoating protects asphalt from UV damage, water infiltration, and chemical spills.
In This Guide:
1. What Is Sealcoating?
Sealcoating is the process of applying a thin protective layer over existing asphalt pavement. Think of it as sunscreen for your driveway. The coating creates a barrier between the asphalt binder and the elements that destroy it: ultraviolet radiation, water, oxygen, and automotive chemicals like gasoline and motor oil.
Here is the critical distinction that many homeowners miss: sealcoating is not a structural repair. It does not fill potholes. It does not fix alligator cracking. It does not add load-bearing capacity. If your driveway has significant structural damage, you need patching, overlay, or full-depth replacement. Sealcoat goes on top of asphalt that is still structurally sound but showing early signs of oxidation and surface wear.
The Chemistry Behind It
A sealcoat bucket is not just black paint. It is a carefully formulated emulsion containing four primary components:
- Base material (40-50% of the mix): Either refined coal tar pitch or asphalt emulsion. This is what creates the waterproof film. Coal tar is derived from the distillation of coal; asphalt emulsion is derived from petroleum crude. Both produce a dark, flexible coating, but they behave differently in the field.
- Water (25-35%): The carrier that allows the emulsion to be applied as a liquid. As the water evaporates, the solids cure into a hard film. This is why temperature and humidity matter so much during application.
- Aggregate filler (5-15%): Fine silica sand or blackite slag mixed into the emulsion. This adds texture for skid resistance and increases the thickness of each coat. Without sand, the cured film is dangerously slick when wet.
- Additives (2-5%): Latex polymers (SBR or acrylic) improve flexibility and adhesion. Rubberizing agents prevent the film from becoming brittle in cold weather. Some formulations also include UV stabilizers and drying accelerants.
When you hire a professional sealcoating crew, they mix these components on-site using a mechanical agitator mounted on their spray truck. The sand settles constantly, so continuous agitation is non-negotiable. A crew that simply opens a drum and starts spraying without mixing is cutting corners in a way that will become visible within the first winter.
What Sealcoating Actually Protects Against
Asphalt pavement is made of aggregate (crushed stone and sand) bound together by asphalt cement, a petroleum-based binder. That binder starts degrading the moment it is exposed to air. Here is what attacks it:
- UV radiation: Sunlight breaks the carbon bonds in asphalt cement through a process called photo-oxidation. The binder becomes brittle and loses its ability to flex with temperature changes. You can see this happening when your driveway fades from jet black to chalky gray over 2-3 years.
- Water penetration: Once the surface develops micro-cracks from UV damage, rainwater seeps into the asphalt structure. In freezing climates, that water expands by roughly 9% as it turns to ice, widening cracks from within. This is the freeze-thaw cycle that destroys more driveways than any other single factor.
- Oxidation: Oxygen reacts with the lighter oils (maltenes) in the asphalt binder, converting them into heavier, more rigid compounds (asphaltenes). The pavement literally hardens and shrinks, pulling itself apart in the form of longitudinal cracks.
- Chemical attack: Gasoline, diesel, motor oil, power steering fluid, and antifreeze are all petroleum solvents. They dissolve the asphalt binder on contact, creating soft spots that ravel under tire traffic. Even a single winter of a leaking oil pan can destroy a 2-foot diameter patch of unsealed asphalt.
Sealcoating works by filling the surface voids and creating a sacrificial layer that absorbs this punishment instead of your pavement. The sealer degrades first, and when it does, you apply another coat. The underlying asphalt structure stays intact far longer than it would unprotected.
The Bottom Line
A properly sealed asphalt driveway can last 20-30 years. An unsealed driveway in the same climate typically shows serious deterioration within 8-12 years. The cost difference over the life of the pavement is dramatic: regular sealcoating at $0.80-$1.50 per square foot every 3 years versus full repaving at $7-$13 per square foot when the driveway fails prematurely. Use our full asphalt repaving calculator to see what replacement would cost for your specific driveway.
2. Sealcoating Cost Breakdown for 2026
Sealcoating pricing has two distinct tiers: what you pay for materials if you do it yourself, and what a professional crew charges for labor, equipment, and commercial-grade product. The gap between DIY and professional is wider than most homeowners expect, and understanding why helps you make a smarter decision.
Professional Sealcoating Rates
Professional sealcoating contractors typically price residential jobs on a per-square-foot basis, with a minimum charge that covers mobilization. Here is the current pricing landscape:
- Spray application: $0.75 - $1.00 per square foot. This is the fastest method and most common for large, open driveways. The crew uses a truck-mounted spray system with a wand or spray bar. Coverage is thinner than brush application, which means shorter lifespan per coat.
- Brush/squeegee application: $1.00 - $1.50 per square foot. The sealer is poured onto the surface and spread by hand with a large squeegee brush. This produces a thicker, more uniform coat and forces the sealer deeper into surface voids. It also takes 3-4 times longer than spraying.
- Two-coat professional application: $1.25 - $2.00 per square foot. Many contractors offer a two-coat service where the first coat is sprayed and the second is brushed. This is the gold standard for longevity.
Mobilization Minimums
Every professional sealcoating job has a minimum charge, typically $250-$450 regardless of driveway size. A contractor must load the spray truck, drive to your location, set up cones and barriers, mask off garage doors and walkways, and clean equipment afterward. This overhead exists whether your driveway is 150 square feet or 1,500 square feet. For small driveways, the minimum charge dominates the total cost.
Cost by Driveway Size
| Driveway Type | Approx. Size | DIY Cost | Professional Cost |
|---|---|---|---|
| Single Car (Short) | 200 sq ft | $30 - $50 | $250 - $350 (min charge) |
| Double Car (Standard) | 600 sq ft | $90 - $150 | $450 - $900 |
| Long / Country Lane | 1,500 sq ft | $225 - $375 | $1,125 - $2,250 |
| Large / Multi-Vehicle | 3,000 sq ft | $450 - $750 | $2,250 - $4,500 |
What Drives Price Variation?
The spread between the low and high end of professional pricing comes down to several factors:
- Geographic market: Sealcoating in the Northeast (New England, Mid-Atlantic) runs 15-25% higher than in the Southeast or Midwest, driven by shorter work seasons and higher labor costs.
- Condition of existing pavement: A driveway with 50 linear feet of crack filling adds $75-$150 to the job. Heavy oil staining requires specialty primer that adds $0.10-$0.25 per square foot to affected areas.
- Access difficulty: Steep driveways, narrow gates, or properties where the spray truck cannot reach the driveway add time and manual labor.
- Number of coats: A single spray coat is the budget option. Two coats with a brush finish is premium. The material cost difference is modest, but labor nearly doubles.
⚠️ Watch for "Per Bucket" Pricing
Some contractors quote by the bucket rather than by the square foot. A 5-gallon bucket of commercial sealer covers approximately 75-90 square feet at the proper application rate. If a contractor claims a single bucket covers 200+ square feet, they are watering down the product or applying it too thin. Both produce a coat that wears through within months.
DIY Material Costs
If you choose to sealcoat your own driveway, the material cost is dramatically lower. A 5-gallon pail of consumer-grade asphalt emulsion sealer from a home improvement store costs $20-$35 and covers 300-400 square feet at the recommended thickness. That works out to roughly $0.05 - $0.12 per square foot for the sealer alone.
However, you also need supplies: a squeegee brush ($25-$40), crack filler ($8-$15 per tube), painter's tape for edges ($5), and a leaf blower or broom for surface prep. Your total first-time DIY investment runs $75-$120 for a 500 square foot driveway. The squeegee brush is reusable for future applications.
3. When to Sealcoat Your Driveway
Timing is everything with sealcoating. Apply it too early and you trap volatiles in the asphalt that need to escape. Apply it too late and the damage you are trying to prevent has already taken hold. There are two timing questions: when after initial paving, and how often after that.
The 12-Month Cure Rule
This is the single most important rule in sealcoating: never seal new asphalt within the first 12 months after paving. Many contractors recommend waiting a full 18-24 months in cooler climates.
Here is why. Fresh asphalt contains volatile oils (light-end maltenes) that need to evaporate from the surface through a process called oxidative curing. This is actually a controlled, beneficial form of the same oxidation that eventually damages older asphalt. During this initial period, the surface hardens and the binder stabilizes.
If you seal too early, you trap these oils beneath an impermeable film. The trapped volatiles soften the sealer from below, causing it to peel, bubble, or remain perpetually tacky. Worse, the underlying asphalt cannot cure properly, leaving it softer and more vulnerable to tire scuffing and power steering marks.
Quick Rule of Thumb
If your new driveway still smells like asphalt on a hot day, it is not ready for sealer. When the surface has turned from deep black to a medium gray and no longer softens noticeably in direct summer sun, the curing process is substantially complete.
Ongoing Sealcoat Schedule
After the initial cure period and first sealcoat, most driveways benefit from resealing every 2-3 years in moderate climates, or every 3-5 years if you use a premium brush-applied product. The actual interval depends on traffic volume, sun exposure, and climate severity.
Signs Your Driveway Needs Sealing
Rather than sealing on a fixed calendar, learn to read the surface. These are the visual indicators that your previous sealcoat has worn through and the underlying asphalt is exposed:
- Color change: The surface has faded from rich black (sealed) to medium or light gray. This is the single clearest indicator. When you see aggregate stones becoming individually visible, the binder is exposed to UV.
- Hairline surface cracks: Fine cracks (less than 1/4 inch wide) appearing in a random pattern across the surface. These are oxidation cracks forming in the unprotected binder. They are cosmetic now, but they become structural if water gets in and freezes.
- Water absorption test: Pour a cup of water on the driveway surface. On a properly sealed surface, the water beads up and runs off. On a worn or unsealed surface, it soaks in and darkens the pavement. If water absorbs within 30 seconds, you are overdue for a sealcoat.
- Rough texture: The surface feels gritty and sandy underfoot. This means loose aggregate is raveling from the surface because the binder holding it in place has oxidized away.
⚠️ Sealcoating Only Works on Asphalt
This seems obvious, but it comes up regularly: sealcoating is exclusively for asphalt (blacktop) surfaces. Do not apply asphalt sealer to concrete, pavers, stamped surfaces, or gravel. Concrete has its own line of sealers (acrylic or polyurethane-based), and pavers use polymeric sand sealers. Applying asphalt emulsion sealer to concrete will create a sticky, peeling mess that is extremely difficult to remove.
4. DIY vs Professional Sealcoating: An Honest Comparison
This is where the internet gets contentious. DIY sealcoating channels show homeowners achieving beautiful results for $30 in materials. Professional contractors insist that consumer-grade sealer is garbage. The truth sits between these two positions, and it depends heavily on what "success" means to you.
DIY Bucket Sealcoating

The typical homeowner approach: buy a 5-gallon pail of driveway sealer from the home improvement store, stir it with a stick, pour it out, and spread it with a squeegee brush. Total cost for a standard 500 square foot driveway: approximately $75-$100 including supplies.
What you get: Consumer-grade asphalt emulsion sealer is a thinner formulation than commercial product. It contains less aggregate filler, fewer latex polymers, and a lower solids-to-water ratio. This is not deceptive marketing; it is engineered for manual application. A higher-solids product would be too thick for a homeowner to spread evenly with a squeegee.
Performance reality: A single coat of consumer-grade sealer applied with a squeegee typically lasts 1-2 years in a moderate climate before showing significant wear. In high-UV environments (Arizona, Florida, Texas) or high-traffic areas, it may wear through within a single season. Two coats extend that to roughly 2-3 years.
Best suited for: Small driveways (under 400 square feet), tight budgets, and homeowners who enjoy hands-on maintenance. Also a reasonable choice if you seal every 1-2 years and treat it as routine upkeep similar to lawn mowing.
Professional Spray Application
A professional crew uses a truck-mounted spray system with a 300+ gallon tank of commercial-grade sealer. The product is a higher-solids formulation with more aggregate filler and polymer content. The spray system atomizes the sealer for even coverage at a controlled thickness.
Cost for a 500 sqft driveway: $375-$600 for a single spray coat, or $500-$750 for two coats.
Performance reality: A single spray coat of commercial sealer lasts 2-3 years. The higher-quality product and more controlled application thickness account for the improved durability. Spray application, however, produces the thinnest coat of any professional method.
Best suited for: Medium to large driveways, homeowners who want professional results without premium pricing, and driveways in good condition that just need routine maintenance sealing.
Professional Brush/Squeegee Application
The premium option. The crew pours commercial-grade sealer in ribbons across the driveway and spreads it by hand with large industrial squeegee brushes. This forces the product deep into surface voids and cracks, creating the thickest possible coat.
Cost for a 500 sqft driveway: $500-$750 for a single coat, or $700-$1,000 for two coats.
Performance reality: A brush-applied commercial sealcoat lasts 3-5 years in moderate climates. This is the longest-lasting application method and the one most professional sealcoaters recommend for driveways that see daily traffic.
| Method | Cost per Sq Ft | Typical Lifespan | Best For |
|---|---|---|---|
| DIY (bucket + squeegee) | $0.15 - $0.25 | 1-2 years | Small driveways, tight budgets |
| Pro spray | $0.75 - $1.00 | 2-3 years | Large driveways, routine maintenance |
| Pro brush/squeegee | $1.00 - $1.50 | 3-5 years | High-traffic driveways, premium results |
| Pro two-coat (spray + brush) | $1.25 - $2.00 | 4-5 years | Maximum protection |
The Cost-Per-Year Calculation
When you compare methods on a cost-per-year-of-protection basis, the picture shifts. Consider a 600 square foot driveway over a 10-year period:
- DIY every 1.5 years (7 applications): 7 x $120 = $840 total, plus roughly 14 hours of labor.
- Professional spray every 2.5 years (4 applications): 4 x $525 = $2,100 total, zero labor from you.
- Professional brush every 4 years (3 applications): 3 x $750 = $2,250 total, zero labor from you.
DIY wins on raw cost. But when you factor in the value of 14 hours of manual labor over a decade, the difference narrows. And the professional applications provide consistently thicker coverage that better protects the asphalt investment underneath.
5. Types of Driveway Sealer
Not all sealers are the same product in different buckets. There are four fundamentally different chemistries used for asphalt sealing, and choosing the wrong one for your situation leads to poor results regardless of how well you apply it.
Coal Tar Emulsion
Coal tar sealer has been the industry standard since the 1960s. It is derived from the distillation of bituminous coal and produces the darkest, most chemical-resistant coating available. Coal tar is naturally resistant to petroleum solvents, which means gasoline drips and oil leaks do not dissolve the film the way they attack asphalt-based sealers.
Performance: Coal tar emulsion provides the best overall protection against UV, water, and chemical attack. A properly applied two-coat system can last 3-5 years in moderate climates. It is the product that virtually all commercial parking lot sealcoating contractors use for its durability and fuel resistance.
The controversy: Coal tar contains polycyclic aromatic hydrocarbons (PAHs), which are classified as probable carcinogens. Research from the U.S. Geological Survey has shown that parking lots sealed with coal tar contribute significantly higher levels of PAHs to stormwater runoff compared to asphalt-based alternatives. As a result, several jurisdictions have banned or restricted coal tar sealants:
- Washington, D.C. (banned since 2010)
- Austin, Texas (banned since 2005)
- Minnesota (statewide ban since 2014)
- Washington State (banned since 2012)
- Multiple counties in New York, Wisconsin, and Maryland
Before purchasing coal tar sealer, verify it is legal in your municipality. If you are in a banned area, asphalt emulsion is your primary alternative.
Asphalt Emulsion
Asphalt emulsion sealer uses petroleum-based asphalt cement as the base material instead of coal tar. It is considered the environmentally friendlier option and is the default choice in areas where coal tar is restricted.
Performance: Asphalt emulsion provides good UV and water protection. Its primary weakness compared to coal tar is chemical resistance. Gasoline, diesel, and motor oil will soften and dissolve asphalt emulsion sealer on contact. For driveways where vehicles park and may drip fluids, this is a meaningful drawback.
Durability: Slightly shorter lifespan than coal tar, typically 2-4 years per application. The film is softer and more flexible, which can be an advantage in very cold climates where coal tar sometimes cracks.
Cost: Similar to coal tar: $0.08-$0.15 per square foot for materials, $0.75-$1.50 per square foot professionally applied.
Acrylic Sealer
Acrylic sealers are the premium tier of driveway protection. These water-based acrylic polymer coatings produce a harder, more UV-stable film than either coal tar or asphalt emulsion. They are available in a range of colors (not just black), which is why they are popular for decorative asphalt surfaces, tennis courts, and commercial properties with branding requirements.
Performance: Acrylic sealers offer superior UV resistance and color retention. They do not fade to gray the way asphalt emulsion does. They also provide better chemical resistance than asphalt emulsion (though still less than coal tar).
Durability: 4-7 years per application with proper prep and two coats. This is the longest-lasting option.
Cost: $2.00-$3.50 per square foot professionally applied. Materials alone run $0.30-$0.60 per square foot. This is 2-3x the cost of conventional sealcoating, but the extended lifespan often makes it cost-competitive on a per-year basis.
Drawback: Acrylic coatings build film thickness with each application. After multiple coats over many years, the total film can become thick enough to peel or delaminate. Professional applicators limit total acrylic buildup to 3-4 coats before stripping and restarting.
Oil-Based (Penetrating) Sealers
Unlike the three options above, oil-based sealers do not form a surface film. Instead, they penetrate into the top 1/4 to 1/2 inch of the asphalt surface and rejuvenate the binder from within. They restore the maltene oils that oxidation removes, making the asphalt more flexible and resistant to cracking.
Performance: Oil-based sealers do not change the appearance of the driveway (it will not turn black again). They do not provide chemical resistance or create a waterproof barrier. What they do is extend the life of the asphalt binder itself by reversing early-stage oxidation.
Best use case: Older driveways (8-15 years) that are still structurally sound but showing oxidation cracking. A penetrating oil treatment followed by a surface sealcoat combines internal rejuvenation with external protection.
Cost: $0.15-$0.30 per square foot for materials. Rarely applied professionally for residential work because the benefits are difficult to demonstrate to homeowners (there is no visible color change).
| Sealer Type | UV Protection | Chemical Resistance | Lifespan | Cost / Sq Ft |
|---|---|---|---|---|
| Coal Tar | Excellent | Excellent | 3-5 years | $0.75 - $1.50 |
| Asphalt Emulsion | Good | Poor | 2-4 years | $0.75 - $1.50 |
| Acrylic | Superior | Good | 4-7 years | $2.00 - $3.50 |
| Oil-Based | Moderate | None | 2-3 years | $0.15 - $0.30 |
6. Prep Work: Why It Is 80% of the Job
Ask any sealcoating contractor what separates a job that lasts from one that peels, and the answer is always the same: preparation. The actual sealer application takes 30-60 minutes for a typical residential driveway. The prep work before that takes 2-4 hours. Homeowners who skip or rush the prep phase get results that reflect it.
Step 1: Weed and Vegetation Removal
Pull all weeds and grass growing through cracks. Trim back any vegetation encroaching on the driveway edges. Vegetation left under the sealcoat will continue growing and push through the new coating within weeks. For persistent weeds in cracks, apply a non-selective herbicide 5-7 days before sealing and allow the vegetation to fully die back.
Step 2: Crack Filling
Every crack wider than 1/8 inch must be filled before sealing. Sealcoat is a surface coating, not a crack filler. It will bridge over hairline cracks temporarily, but anything wider will telegraph through and reopen.
There are two crack-filling approaches:
- Hot-pour rubberized crack filler ($$$): This is what professionals use. A rubberized asphalt compound heated to 380-400°F and poured into cracks using a melter applicator. It bonds to the crack walls and remains flexible through temperature cycles. A properly filled crack stays sealed for 5-8 years. Professional crack filling runs $1.00-$2.50 per linear foot.
- Cold-pour crack filler ($): The liquid tube or pour-bottle products available at hardware stores. These are asphalt emulsion with rubber polymers, applied at ambient temperature. They are dramatically easier to use, but they shrink as they cure and typically last only 1-2 seasons before needing reapplication. Cost: $5-$12 per tube, each covering 15-30 linear feet.
Step 3: Oil Spot Treatment
Oil stains are sealcoating's worst enemy. The petroleum in motor oil, transmission fluid, and power steering fluid dissolves the asphalt binder and creates a contaminated zone that sealcoat will not adhere to. If you apply sealer over an oil spot, the sealer will peel off that area within the first month.
Treatment protocol for oil spots:
- Degrease: Scrub the stain with trisodium phosphate (TSP) solution and a stiff bristle brush. Rinse thoroughly. Repeat if the stain is heavy.
- Dry completely: Allow the degreased area to dry for 24-48 hours.
- Prime: Apply an oil spot primer (shellac-based or specialty asphalt primer) to the affected area. This creates a barrier between the contaminated asphalt and the sealcoat. Allow the primer to dry per manufacturer instructions (typically 2-4 hours).
- Seal: Apply the sealcoat over the primed area normally. The primer provides the adhesion that the oil-contaminated surface cannot.
Step 4: Power Washing
The entire driveway must be cleaned before sealing. Dirt, dust, tree pollen, mildew, and loose aggregate on the surface prevent the sealer from bonding to the asphalt. A pressure washer at 2,500-3,000 PSI with a fan tip nozzle is ideal. Start at the high end of the driveway and work downhill, pushing debris off the surface entirely.
Critical detail: After power washing, the surface must dry completely before sealing. On a warm, sunny day, allow 4-6 hours. On an overcast or humid day, wait overnight. Applying sealer over a damp surface traps moisture beneath the film, causing white haze, poor adhesion, and premature peeling.
Step 5: Edging and Masking
Protect everything that is not asphalt. Use painter's tape and kraft paper or plastic sheeting to mask:
- Garage door weatherstripping and the bottom 6 inches of the door
- Concrete walkways and curbing adjacent to the driveway
- Brick or stone borders
- Foundation walls and siding along the driveway edge
- Sprinkler heads, utility covers, and drain grates
Sealcoat on concrete is extremely difficult to remove. On painted surfaces, it is essentially permanent. The 15 minutes you spend masking saves hours of cleanup.
Professional Prep Checklist
- ✓ All vegetation removed from cracks and edges
- ✓ Cracks wider than 1/8" filled and cured (24+ hours for cold-pour, 1+ hour for hot-pour)
- ✓ Oil spots degreased, dried, and primed
- ✓ Entire surface power washed and fully dry
- ✓ All non-asphalt surfaces masked and protected
- ✓ Weather forecast checked: no rain for 24 hours, temp above 50°F
7. Weather Requirements for Sealcoating
Sealcoat is a water-based emulsion. Its cure process depends entirely on evaporation: water leaves the film, and the remaining solids coalesce into a continuous coating. Anything that slows evaporation (cold, humidity, shade) or washes the uncured film away (rain) will compromise the result. This is not a suggestion; it is physics.
Temperature Rules
The minimum temperature requirement has two components that many homeowners overlook:
- Air temperature: Must be at or above 50°F (10°C) at the time of application and for at least 48 hours after.
- Surface temperature: The asphalt pavement itself must be at or above 50°F. On a 55°F morning, the pavement may still be in the low 40s from overnight cooling, especially in shaded areas. Use an infrared thermometer to verify.
Below 50°F, the latex polymers in the sealer cannot properly coalesce. The film appears to cure on the surface but remains soft and powdery underneath. The first rain or tire pass strips it right off.
The other extreme matters too. Surface temperatures above 130°F (common on dark asphalt in direct summer sun) cause flash-drying. The water evaporates so rapidly that the solids do not have time to flow together into a uniform film. The result is a streaky, uneven appearance with poor adhesion. In extreme heat, professional crews start at dawn and stop by mid-morning, or they schedule for overcast days.
Rain and Moisture
This is the rule that ruins the most sealcoating jobs: no rain for 24 hours before application and 24 hours after. Some high-performance products specify 48 hours of dry weather post-application.
Rain falling on uncured sealcoat washes the emulsion off the surface. You will see brown-tinted runoff flowing into your yard and storm drains, and the pavement will show bare spots and streaks where the sealer was removed. Even a light mist can damage a freshly applied coat during the first 4-6 hours.
Dew is also a problem. In early fall, overnight temperatures can drop enough to form dew on the driveway surface. If the sealer has not fully cured before dew forms (typically 6-8 hours after application), the moisture can turn the surface white or hazy. This is called "blushing" and, while it sometimes resolves after a few sunny days, it often indicates poor film formation that reduces the coating's lifespan.
Best Months for Sealcoating
In most of the continental United States, the ideal sealcoating window is May through September. Here is the month-by-month breakdown:
- April: Marginal. Daytime temperatures often reach the 50s-60s, but overnight lows in many regions still drop below the 50°F threshold. Spring rain is unpredictable. Not recommended unless you are in the Deep South.
- May - June: Ideal. Warming temperatures, longer days, and generally drier weather patterns. Contractors are beginning their season and may offer competitive early-season pricing.
- July - August: Good, but watch for extreme heat. Schedule for early morning application to avoid flash-drying. Afternoon thunderstorms are common in many regions, so check the hourly forecast, not just the daily one.
- September: Excellent in most markets. Temperatures moderate, humidity drops, and the fall dry season begins in many areas. This is often when contractors have the most availability.
- October: Marginal to risky. Overnight temperatures begin dropping below 50°F in the northern half of the country. If you seal in early October, you need the overnight low to stay above 50°F for two nights after application.
- November - March: Off-season in most of the country. Do not attempt sealcoating during these months unless you are in Florida, Southern California, or the Desert Southwest.
⚠️ Avoid Sealing in Direct Midday Sun
Counterintuitive but important: the hottest, sunniest conditions are not ideal for sealcoating. When the asphalt surface temperature exceeds 130°F, the sealer flash-dries on contact and cannot level properly. This produces visible squeegee marks, lap lines, and an uneven finish. Professional crews in hot climates apply sealer between 6:00 AM and 10:00 AM, then stop until late afternoon when the surface cools.
8. Common Sealcoating Mistakes
Most sealcoating failures are not product failures. They are application failures. The sealer itself is a well-engineered product when used correctly. Here are the mistakes that produce the ugly driveways you see in "sealcoating gone wrong" photos:
Mistake #1: Sealing Too Early After Paving
New asphalt needs at minimum 12 months (preferably 18-24 months) before its first sealcoat. Eager homeowners who seal their brand-new driveway within weeks trap volatile oils in the pavement. The sealer either peels off in sheets or remains permanently soft and sticky, tracking black residue into the house on shoes.
Mistake #2: Over-Application (Puddle Coating)
More is not better. The most common DIY error is applying the sealer too thick. When sealer pools in low spots or is spread in a layer thicker than 1/16 inch, the surface skins over while the interior remains liquid. As the interior eventually dries, it shrinks, and the hardened surface cracks and peels in large flakes.
Correct application rate: 0.10 to 0.15 gallons per square yard per coat, which produces a thin, uniform film. If you can see the squeegee marks disappearing as the sealer levels, you are at the right thickness. If the surface looks like a mirror-smooth lake of black liquid, you have applied too much.
Mistake #3: Skipping Crack Filling
Sealcoat is a coating, not a filler. Applying sealer over open cracks does not seal them. The sealer film bridges the crack temporarily, but the first temperature cycle opens the crack, tearing through the thin bridge. Water enters, the crack grows, and the sealer peels back from the crack edges. Fill every crack wider than 1/8 inch before sealing. No exceptions.
Mistake #4: Not Mixing the Product
Driveway sealer settles in the bucket. The aggregate sand drops to the bottom, the water rises to the top, and the emulsion separates into layers. A bucket that sits on a store shelf for months can have 2-3 inches of packed sand at the bottom.
Stirring with a paint stick is not sufficient. You need a heavy-duty mixing paddle on a drill running for 3-5 minutes per bucket until the consistency is completely uniform from top to bottom. Professional crews use mechanical agitators that run continuously during application for exactly this reason.
Mistake #5: Applying Before Rain
"It said 20% chance of rain, so I went for it." This sentence has ruined more sealcoating jobs than any other. Check the hourly forecast, not the daily summary. A 20% daily chance can mean a 60% chance of rain during a specific 2-hour window in the afternoon. If the sealer gets rained on within the first 6-8 hours, the job is lost. You will need to wait for the damaged film to fully dry, then either recoat over it (if the damage is minor) or, in severe cases, pressure wash the failed sealer off and start over.
Mistake #6: Driving on It Too Soon
Freshly applied sealcoat requires a minimum of 24 hours of dry, warm weather before foot traffic and 48 hours before vehicle traffic. In cooler or humid conditions, extend these times to 48 and 72 hours respectively.
Driving on uncured sealer scuffs the surface, leaves permanent tire marks, and pushes the soft film around. Power steering marks (turning the wheels while the car is stationary) on fresh sealcoat are the most common complaint sealcoating contractors receive, and they are almost always caused by the homeowner moving their car back onto the driveway too early.
Mistake #7: Sealing Over Structural Damage
Sealcoating cannot fix alligator cracking (interconnected cracks that resemble reptile skin), large potholes, or base failure. Applying sealer over these conditions is purely cosmetic and lasts only until the next rain or temperature cycle. If more than 25-30% of your driveway surface shows structural distress, sealcoating is not the answer. You need patching, overlay, or a full replacement.
9. How Long Does Sealcoating Last?
There is no single answer because the variables are significant. A sealcoat applied in Phoenix, Arizona, will degrade differently than the same product applied in Portland, Maine. Here are the factors that determine how many years you get from each application.
Traffic Volume
Every tire pass abrades the sealcoat surface. A driveway used by two cars twice daily (4 passes per day, 1,460 per year) will show wear patterns in the tire tracks within 18-24 months. A vacation home driveway with weekend-only traffic may retain its sealcoat for 5+ years with the same product.
Heavy vehicles accelerate wear dramatically. A single pass from a delivery truck or garbage truck exerts 3-5x the surface pressure of a passenger car. If your driveway serves as the approach for heavy vehicles (oil delivery, moving trucks, construction equipment), plan on more frequent resealing.
UV Exposure
Sunlight is the primary degradation mechanism for sealcoat films. South-facing driveways in the Sun Belt receive 2-3x the annual UV dose of north-facing driveways in New England. A driveway shaded by mature trees will retain its sealcoat significantly longer than an exposed one in the same neighborhood. This is one reason acrylic sealers (with superior UV stability) make financial sense in high-exposure areas despite their higher upfront cost.
Climate and Freeze-Thaw Cycles
Freeze-thaw cycling stresses the sealcoat film by forcing it to expand and contract with the underlying pavement. Each cycle creates micro-fractures in the coating. Climates with frequent freeze-thaw transitions (the Mid-Atlantic, upper Midwest, and mountain West) degrade sealcoat faster than regions with either consistently cold or consistently warm winters.
De-icing chemicals (rock salt, calcium chloride, magnesium chloride) also attack sealcoat films. Salt brine is corrosive and penetrates micro-cracks in the coating. If you live in a heavy-salting region, expect to reseal 1 year sooner than the product specification suggests.
Sealer Quality and Application Method
This is the variable you control most directly. Here are the realistic lifespan ranges based on product quality and method:
- Consumer-grade sealer, single DIY coat: 1-2 years
- Consumer-grade sealer, two DIY coats: 2-3 years
- Commercial-grade sealer, single spray coat: 2-3 years
- Commercial-grade sealer, two-coat spray + brush: 3-5 years
- Premium acrylic sealer, two professional coats: 4-7 years
Diminishing Returns After Multiple Coats
There is a common misconception that you can keep adding sealcoat indefinitely to build up a thicker, more durable coating. In practice, there are diminishing returns after approximately 3 coats. Each additional layer adds weight and reduces flexibility. A heavy buildup of sealcoat can actually crack and peel in cold weather because the thick, rigid film cannot flex with the pavement beneath it.
When you see driveways with thick, flaking black sheets lifting off the surface, this is usually the result of years of over-sealing. The solution is to pressure-wash all the loose and failing sealcoat off, let the surface dry and stabilize, and start fresh with a proper two-coat application.
Sealcoating vs Repaving: When to Stop Sealing
Sealcoating extends the life of sound asphalt. It cannot revive asphalt that has reached the end of its structural life. If your driveway shows widespread alligator cracking, base failure (soft sinking areas), or has been patched so many times it resembles a quilt, further sealcoating is wasting money. It is time to talk about overlay or replacement. Use our full asphalt repaving calculator to understand what that investment looks like for your specific driveway size.
10. Frequently Asked Questions
Can I sealcoat my driveway myself?
Yes. DIY sealcoating is one of the more accessible home maintenance tasks. The materials are available at any home improvement store, the tools are inexpensive (a squeegee brush costs $25-$40), and the technique is straightforward. The limiting factor is physical effort: spreading sealer across a 600 square foot driveway is demanding work, similar to mopping a very large floor with a heavy mop. Expect to spend 4-6 hours on prep and application for a standard two-car driveway. The primary trade-off is durability: consumer-grade sealer applied by a homeowner typically lasts 1-2 years per coat, compared to 3-5 years for a professional application with commercial-grade product.
How much does sealcoating a driveway cost in 2026?
For a standard 600 square foot residential driveway, professional sealcoating runs $450-$900 in 2026, depending on your market and the number of coats. DIY costs $90-$150 in materials for the same area. Smaller driveways often hit the contractor's minimum charge of $250-$450 regardless of actual square footage. For driveways over 1,500 square feet or commercial parking lot sealcoating, per-square-foot rates drop as the total area increases.
How often should I sealcoat my driveway?
Every 2-3 years for spray-applied commercial sealer, every 3-5 years for brush-applied commercial sealer, and every 1-2 years for DIY consumer-grade sealer. Instead of following a rigid schedule, inspect your driveway annually: if the surface has faded to gray and water no longer beads on the surface, it is time to reseal regardless of when the last application was done.
What is the best temperature for sealcoating?
The ideal range is 65°F to 90°F for both air and pavement surface temperature. The absolute minimum is 50°F (air and surface) with no freezing temperatures expected for 48 hours after application. Avoid applying when the pavement surface exceeds 130°F, as this causes flash-drying and poor film formation.
Can you sealcoat a concrete driveway?
No. Asphalt sealcoating products are formulated exclusively for asphalt (blacktop) surfaces. They will not bond to concrete and will peel off quickly, creating a mess. Concrete driveways have their own category of sealers (acrylic concrete sealers, penetrating silane/siloxane sealers, polyurethane coatings) that are chemically different products.
How long before I can drive on a freshly sealed driveway?
In warm, dry conditions (above 70°F, low humidity, full sun), the minimum cure time before vehicle traffic is 24-48 hours. In cooler or humid conditions, extend to 48-72 hours. The sealer should be completely dry to the touch and should not show footprints when you walk on it. Power steering turns (rotating the wheel while stationary) should be avoided for the first 72 hours even in ideal conditions, as the cured film is still reaching full hardness.
Is coal tar sealer dangerous?
Coal tar contains polycyclic aromatic hydrocarbons (PAHs), which are classified as probable carcinogens by the EPA and International Agency for Research on Cancer. During application, coal tar sealer produces fumes that can irritate skin, eyes, and respiratory passages. After curing, the sealed surface continues to release PAHs into stormwater runoff, particularly during the first year. Several U.S. states and municipalities have banned coal tar sealants for environmental reasons. Asphalt emulsion sealer is the primary alternative and does not carry the same health or environmental concerns.
Does sealcoating fill cracks?
No. Sealcoat is designed to coat the surface of sound asphalt, not to fill voids. It will temporarily bridge over hairline cracks (under 1/8 inch), but any crack wider than that must be filled with dedicated crack filler before sealing. Applying sealer over unfilled cracks is the most common reason for premature sealcoat failure along crack lines.
What happens if it rains right after sealcoating?
Rain within the first 6-8 hours after application will wash the uncured sealer off the surface. You will see black-brown runoff leaving the driveway, and the finished surface will show bare spots, streaks, and discoloration. If rain falls 8-16 hours after application, the damage is usually less severe (possible whitening or hazing of the surface) but still compromises the coat's durability. After 24 hours of warm, dry curing, light rain will not affect the sealer.
Can I apply sealcoat over old sealcoat?
Yes, as long as the existing sealcoat is still adhering to the asphalt surface. Lightly worn sealcoat provides good adhesion for a new coat. However, if the existing sealcoat is peeling, flaking, or lifting in sheets, the new coat will not adhere any better than the old one. In that case, pressure-wash the loose material off, allow the surface to dry and stabilize, then apply the new coat directly to the exposed asphalt.
About This Guide
This guide is maintained by the DrivewaySatellite paving specialists and updated regularly to reflect current material pricing, product developments, and regional regulatory changes. Our cost data is sourced from contractor surveys, manufacturer MSRP tracking, and real-world project reports submitted through our calculator platform. All pricing reflects 2026 market conditions for the continental United States.
References
- 1. Pavement Coatings Technology Council (PCTC) - Sealcoat Application Best Practices
- 2. U.S. Geological Survey - PAHs from Coal-Tar-Based Pavement Sealcoat
- 3. National Asphalt Pavement Association (NAPA) - Pavement Preservation Guidelines
- 4. Federal Highway Administration (FHWA) - Pavement Maintenance and Rehabilitation