Commercial Parking Lot Sealcoating: The Definitive Guide for Property Managers
This guide covers everything a commercial property manager, HOA board member, or facility director needs to know about parking lot sealcoating. From cost analysis and scheduling logistics to ADA striping compliance and long-term capital planning, the information here is drawn from decades of collective experience in the commercial paving maintenance industry.
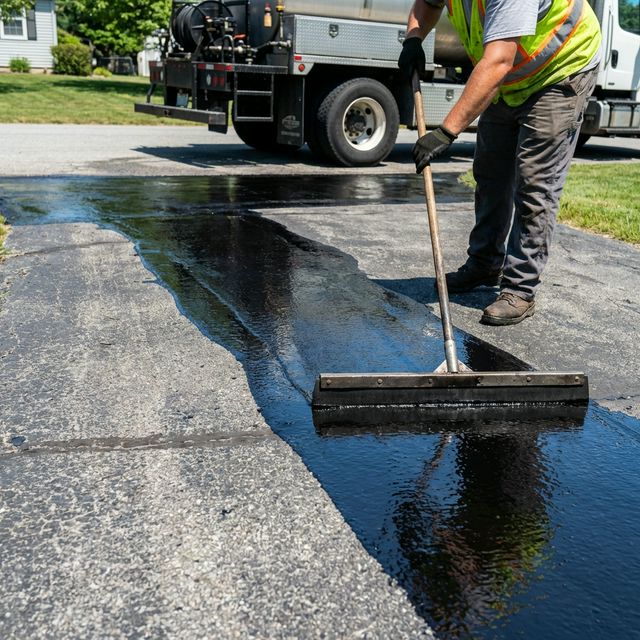
A properly sealcoated parking lot can defer major repaving for 5 to 8 additional years.
In This Guide:
1. Why Sealcoat Your Parking Lot?
Asphalt parking lots begin to degrade the moment the paver leaves the site. UV radiation from sunlight breaks down the liquid asphalt binder (the "glue" holding the aggregate stones together), turning a flexible, jet-black surface into a brittle, gray, crack-prone liability. Sealcoating applies a protective film over the oxidized surface that blocks UV rays, resists petroleum spills from vehicles, and restores a uniform dark appearance.
For commercial properties, the stakes go far beyond cosmetics. A poorly maintained lot is a lawsuit waiting to happen. Cracks wider than half an inch become trip hazards. Potholes can damage vehicles and injure pedestrians. And a faded, crumbling lot sends a clear signal to prospective tenants and their customers: this property is neglected.
Liability Reduction
Slip-and-fall lawsuits in parking lots account for a significant portion of commercial premises liability claims. When asphalt deteriorates, loose aggregate and uneven surfaces create trip hazards. Sealcoating fills minor surface voids and creates a smoother walking surface. More importantly, a documented maintenance history (including sealcoat records with dates, contractor names, and before/after photos) demonstrates "reasonable care" in court. If a tenant or visitor files a claim, your maintenance records become your primary defense.
Property managers who skip sealcoating to save $15,000 often face claims that cost $50,000 to $200,000 in legal fees and settlements. The math is not complicated.
ADA Compliance and Accessibility
Under the Americans with Disabilities Act (ADA), commercial parking lots must maintain accessible routes and spaces in usable condition. Cracks, heaves, and potholes in accessible parking areas or along access aisles are not merely cosmetic problems; they are federal compliance violations. A sealcoating project is the natural time to audit and correct ADA deficiencies, since re-striping is required after every sealcoat application anyway.
Lot Life Extension
The single most compelling financial argument for sealcoating is lifespan extension. Untreated asphalt in a commercial parking lot typically lasts 12 to 15 years before requiring a mill-and-overlay or full-depth replacement. A lot that receives sealcoating every 2 to 3 years, combined with annual crack filling, routinely reaches 22 to 28 years of service life.
Consider the numbers: a 50,000-square-foot parking lot costs approximately $250,000 to $350,000 to mill and overlay with 2 inches of new hot-mix asphalt. A sealcoat application on that same lot runs $7,000 to $11,000. Over 20 years, spending $50,000 on sealcoating (seven applications) to defer a $300,000 overlay by 8 to 10 years is one of the highest-ROI capital maintenance decisions a property manager can make.
💰 The Bottom Line on Lot Life
A $25,000 sealcoating program (3 applications over 9 years) can defer a $250,000+ mill-and-overlay project by 5 to 8 years. That is a 10:1 return on every dollar spent on preventive maintenance.
Curb Appeal and Tenant Retention
For retail centers, office parks, and multi-family properties, the parking lot is the first thing a visitor sees. A freshly sealcoated lot with crisp white striping communicates professionalism and attention to detail. Conversely, a faded lot with weeds growing through cracks tells prospective tenants that the property owner cuts corners. National retail chains (Starbucks, CVS, Chick-fil-A) often include parking lot condition in their lease evaluation criteria. A crumbling lot can cost you a lease renewal.
Property Value and Appraisals
Commercial real estate appraisers use the condition of the parking lot as a factor in their "deferred maintenance" adjustment. A lot that clearly needs $200,000 in repaving will reduce the appraised value by that amount (or more, accounting for inconvenience and risk). A well-maintained, recently sealcoated lot signals to buyers and lenders that the property has been responsibly managed, supporting higher valuations and better loan terms.
2. Commercial Pricing at Scale
Commercial sealcoating pricing follows a volume discount model. The per-square-foot cost drops significantly as lot size increases because the contractor's fixed costs (mobilization, equipment setup, traffic control) are spread across more area. Material costs also drop with bulk purchasing; a contractor ordering 2,000 gallons of sealer for a single job gets a better price per gallon than one ordering 200 gallons.
Sealcoating Cost by Lot Size (2026 National Averages)
| Lot Category | Approx. Size | Parking Spaces | Cost per Sq Ft | Total Cost Range |
|---|---|---|---|---|
| Small Retail / Office | 5,000 sq ft | 15 - 20 spaces | $0.22 - $0.30 | $1,100 - $1,500 |
| Medium Strip Mall | 20,000 sq ft | 60 - 80 spaces | $0.17 - $0.22 | $3,400 - $4,400 |
| Large Shopping Center | 50,000 sq ft | 150 - 200 spaces | $0.14 - $0.18 | $7,000 - $9,000 |
| Large Campus / Mall | 100,000+ sq ft | 300+ spaces | $0.12 - $0.16 | $12,000 - $16,000 |
What Drives the Per-Square-Foot Price?
Several factors push your per-square-foot cost toward the high or low end of these ranges:
- Number of coats: A single coat runs cheaper but provides less protection. Two coats are the industry standard for commercial lots. Some specifications call for three coats in high-traffic drive lanes.
- Surface condition: A lot with extensive cracking requires hot-pour crack fill before sealing, adding $0.03 to $0.08 per square foot to the total project cost.
- Material type: Refined tar sealers cost more than asphalt emulsion sealers. Coal tar products (where legal) provide better fuel resistance but carry environmental restrictions in many jurisdictions.
- Lot geometry: Lots with many islands, curbs, and tight corners require more hand work with squeegees and brushes, which is slower and more expensive than spray application on open pavement.
- Regional labor rates: A crew in the Northeast or Pacific Northwest typically charges 15% to 25% more than the same crew size in the Southeast or Midwest.
Line Striping Add-On Costs
Every sealcoat project requires re-striping, since the sealer covers existing paint lines. Budget these line striping costs into your total project estimate:
| Striping Item | Unit | Cost Range |
|---|---|---|
| Standard parking stall lines | Per linear foot | $0.30 - $0.50 |
| Complete stall (two lines + T-bar) | Per stall | $3.00 - $5.00 |
| Handicap symbol (painted) | Each | $35 - $50 |
| Fire lane markings (red curb) | Per linear foot | $2.00 - $4.00 |
| Directional arrows | Each | $25 - $45 |
| "STOP" or text legends | Each | $40 - $75 |
For a 100-space lot, expect to spend $500 to $800 on re-striping alone. Factor this into every sealcoating budget because it is not optional; an un-striped lot after sealing is an insurance liability and a fire code violation.
⚠️ Budget Tip: Combine Crack Fill + Sealcoat + Striping
Contractors offer significantly better pricing when you bundle crack filling, sealcoating, and re-striping into a single mobilization. Splitting these into three separate projects typically costs 30% to 40% more due to repeated setup and traffic control costs.
3. Striping and ADA Compliance
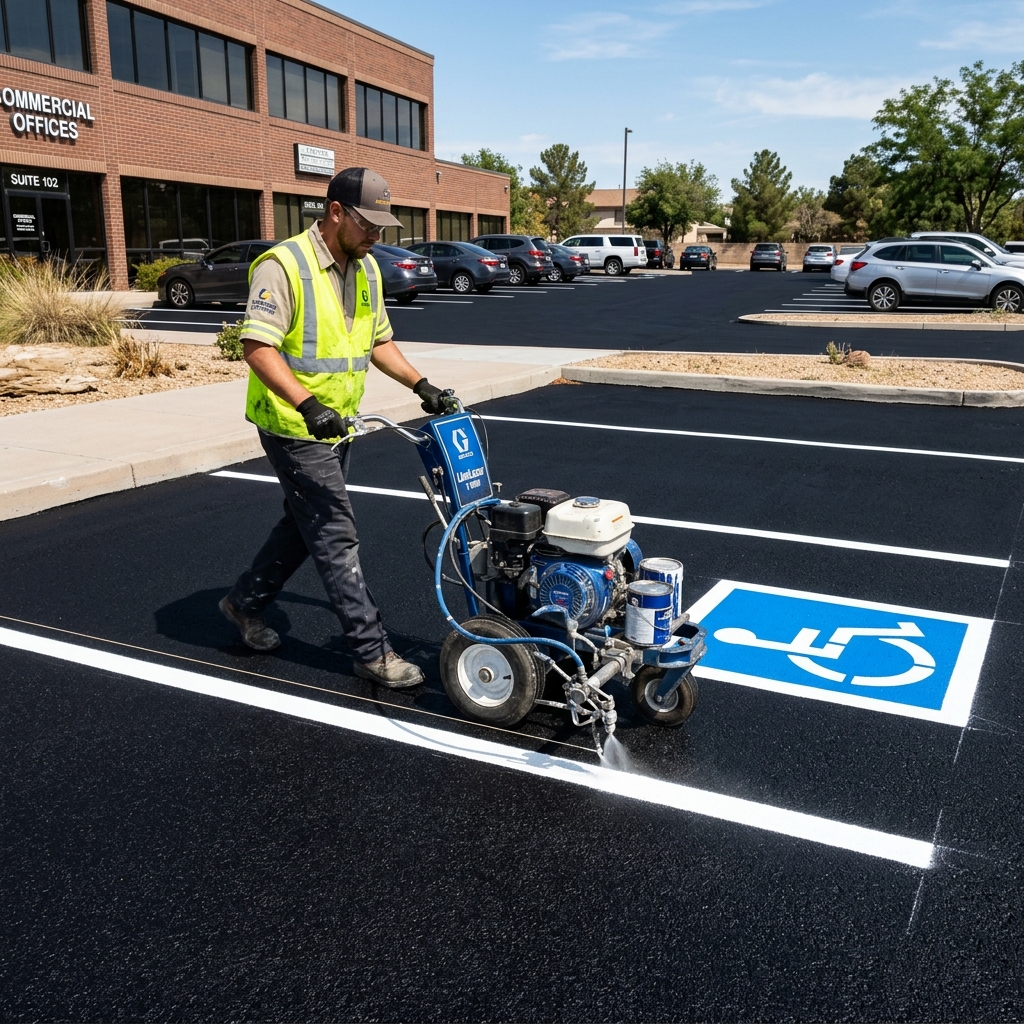
Re-striping a parking lot after sealcoating is not a cosmetic afterthought. It is a legal requirement. Without visible lines, your lot lacks defined traffic flow, parking stall boundaries, and most critically, accessible parking designations mandated by the Americans with Disabilities Act.
When to Re-Stripe
Sealcoat must cure for 24 to 48 hours before striping paint is applied. Painting over wet or tacky sealer causes the paint to peel within weeks. A responsible contractor will schedule striping as a separate mobilization 2 to 3 days after the final sealcoat application. If a contractor promises to sealcoat and stripe on the same day, that is a red flag.
ADA Parking Requirements
The ADA Standards for Accessible Design (2010 revision) specify exact requirements for commercial parking lots. These are federal law, not guidelines. Violations carry fines of $75,000 for a first offense and $150,000 for subsequent offenses. Every sealcoating project is an opportunity to audit and correct your lot's ADA compliance.
Here are the key requirements:
- Number of accessible spaces: For lots with 1 to 25 total spaces, one accessible space is required. Lots with 26 to 50 spaces need two. Lots with 51 to 75 spaces need three. The count increases with lot size, and at least one in every six accessible spaces must be van-accessible (8 feet wide with an 8-foot access aisle, or 11 feet wide with a 5-foot aisle).
- Access aisle dimensions: Every accessible space must adjoin a marked access aisle that is at least 5 feet wide (8 feet for van-accessible). The aisle must connect to an accessible route to the building entrance.
- Signage: Each accessible space must have a vertical sign (not just ground paint) showing the International Symbol of Accessibility. Van-accessible spaces must include a "Van Accessible" designation. Signs must be mounted at least 60 inches above the ground, measured to the bottom of the sign.
- Slope: Accessible spaces and access aisles must have a maximum slope of 2% in any direction (1:50). This is far flatter than the typical 2% cross-slope of regular parking areas. If your lot has areas that exceed this slope, those locations cannot be designated as accessible spaces.
- Surface condition: The accessible route from the parking space to the building entrance must be "firm, stable, and slip-resistant." Cracked, heaved, or potholed pavement in accessible areas fails this standard.
Fire Lane Markings
Local fire codes require fire lanes to be marked with red curbing and/or "NO PARKING - FIRE LANE" stenciling. Fire lanes must remain clear at all times and typically extend 15 feet from the building face. After sealcoating, all fire lane markings must be repainted. Failure to maintain these markings can result in fines from the fire marshal and, more importantly, can impede emergency response.
No-Parking Zones and Crosswalks
Depending on your municipality, you may also need to re-paint:
- Pedestrian crosswalks within the lot
- Loading zone designations
- "No Parking" zones near dumpster enclosures
- Speed bumps or speed table markings (diagonal or chevron stripes)
- Stop bars at intersections within the lot
A good striping contractor will provide a complete lot layout drawing before painting begins. Review this drawing carefully against your local fire marshal's requirements and your lease obligations.
4. Scheduling Around Tenants
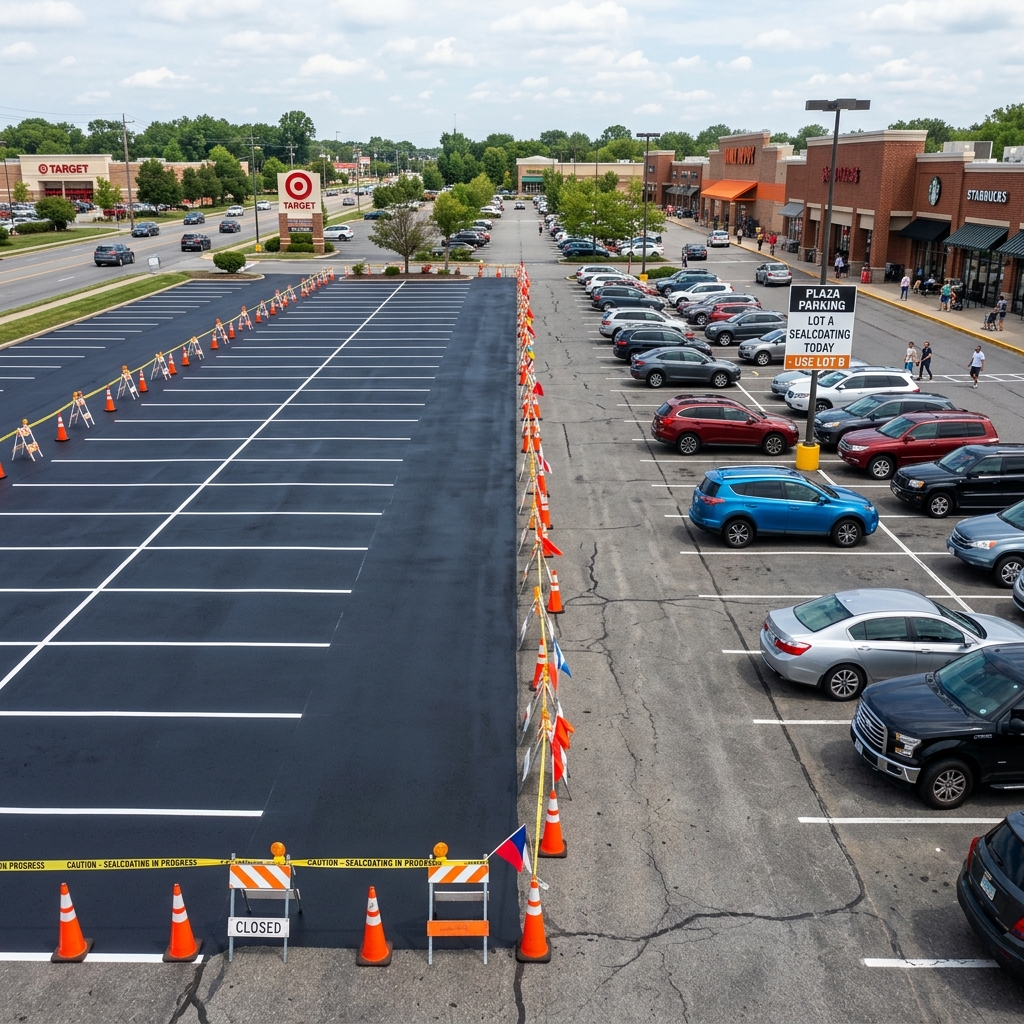
The biggest operational challenge in commercial sealcoating is not the sealer or the weather. It is keeping the building open for business while half the parking lot is barricaded. A poorly planned project alienates tenants, drives away customers, and generates complaints that land on your desk for weeks. A well-planned project is invisible to most occupants.
Phased Sealing: The Half-Lot Method
For lots serving active retail or office buildings, the standard approach is phased sealing. The contractor seals one half of the lot while tenants and customers use the other half, then switches sides the next day (or after the first half cures). This requires careful coordination:
- Traffic control plan: The contractor must provide a written traffic control plan showing barricade placement, pedestrian routing, and temporary directional signage. For larger lots, traffic cones alone are not sufficient. A-frame barricades with reflective tape and temporary "PARKING THIS WAY" signs are the minimum standard.
- Tenant notification: Send written notice to all tenants at least 14 days before the project begins. Include the project dates, the phasing plan, a map showing which sections will be closed on which days, and a contact number for complaints. Follow up with a reminder 3 days before start.
- Customer access: Ensure that at least one building entrance remains accessible from the open portion of the lot at all times. For multi-tenant buildings, coordinate with each tenant to verify that their customers can reach their entrance.
Night Work and Weekend Scheduling
For high-traffic retail locations (grocery stores, restaurants, medical offices), night and weekend work eliminates most tenant disruption. Sealcoating can be applied under artificial light and typically requires ambient temperatures above 50°F. Night work adds a premium to the contract (typically 15% to 25% more than daytime rates) but avoids the revenue loss from closing sections during business hours.
Weekend scheduling is ideal for office parks and professional buildings that are largely empty on Saturdays and Sundays. A contractor can seal the entire lot over a weekend, with striping scheduled for the following weekend after the sealer has fully cured.
Typical Project Timeline
For a lot under 50,000 square feet:
- Day 1: Power sweeping, edge cleaning, oil spot treatment, and crack filling.
- Day 2: First coat of sealer applied to Phase 1 (half the lot).
- Day 3: Second coat on Phase 1; first coat on Phase 2.
- Day 4: Second coat on Phase 2. Lot remains closed for 24-hour cure.
- Day 5-6: Re-striping after cure is complete.
Total project duration: 5 to 6 working days for a standard two-phase, two-coat sealcoat with striping. Larger lots (100,000+ sq ft) may require 8 to 12 working days depending on phasing complexity.
📋 Tenant Notification Template
Include these items in your tenant communication:
- Exact project start and end dates
- Hours of work each day (e.g., 6:00 AM to 6:00 PM, or 8:00 PM to 4:00 AM for night work)
- Map showing which lot sections close on which dates
- Where employees should park during closures
- Contact name and phone number for on-site project manager
- Note about potential odor from sealer (coal tar products have a distinct smell that dissipates within 24 hours)
5. Crack Filling and Patching
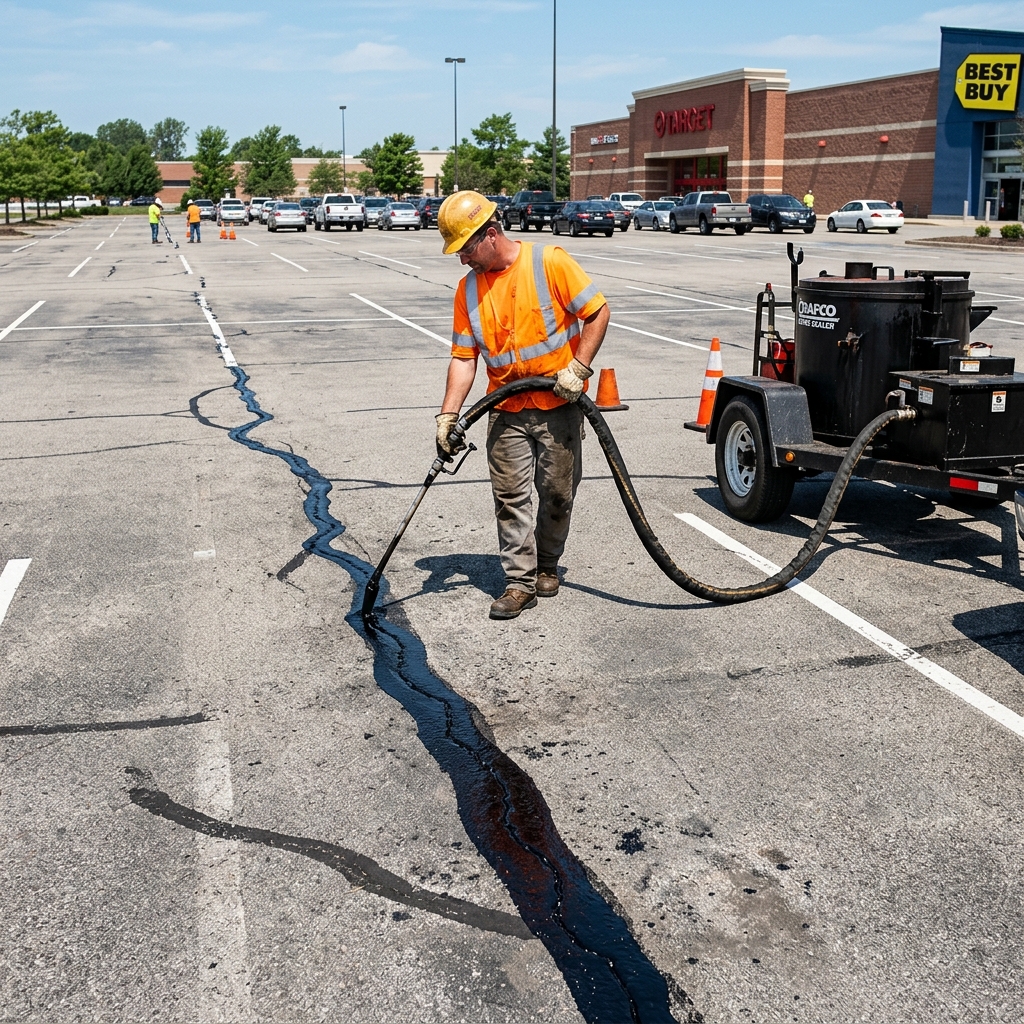
Sealcoating without crack filling is like painting over rust. The sealer cannot bridge cracks wider than a hairline. Water continues to penetrate through untreated cracks, undermining the base and expanding the crack through freeze-thaw cycles. Within one winter, those untreated cracks will telegraph right through your fresh sealcoat, and you will have wasted your entire investment.
Crack filling before sealcoating is non-negotiable for any lot with visible cracking. Here is how the two primary methods compare at commercial scale:
Hot-Pour Rubberized Crack Fill
This is the professional standard for commercial lots. A rubberized asphalt compound is heated to 380°F in a kettle-style melter and applied directly into routed or cleaned cracks using a wand applicator. The material bonds to the crack walls and remains flexible through temperature cycles, expanding and contracting with the pavement.
- Cost: $0.75 to $1.50 per linear foot of crack, or $0.03 to $0.08 per square foot of lot area depending on crack density.
- Durability: 3 to 5 years in most climates before reapplication is needed.
- Best for: Cracks up to 1 inch wide. Wider cracks or alligator cracking require patching, not filling.
- Timing: Must be applied at least 24 hours before sealcoating so the fill material can set.
Cold-Pour Crack Fill
Cold-pour products (the bottles and jugs available at hardware stores) are asphalt emulsion sealants that cure by water evaporation. They are dramatically inferior to hot-pour products for commercial applications:
- They shrink as they cure, pulling away from crack walls within 6 to 12 months.
- They lack the elasticity to handle thermal movement in large pavement surfaces.
- They are labor-intensive to apply at scale (pouring from bottles across a 50,000-square-foot lot is impractical).
Cold-pour products have exactly one use case in commercial settings: emergency temporary fills to prevent trip hazards before a properly scheduled hot-pour project. They should never be specified as the primary crack treatment in a professional scope of work.
Infrared Asphalt Repair for Potholes
Potholes and severely damaged areas cannot be addressed with crack fill or sealcoat. They require structural repair. Infrared asphalt repair is the preferred method for commercial lots because it creates a seamless, full-depth repair without the "patch" look of traditional cut-and-fill methods.
The process works as follows: an infrared heater panel (typically 4 x 6 feet) is placed over the damaged area, heating the existing asphalt to 325°F. The softened pavement is raked, new hot-mix asphalt is added as needed, and the area is compacted with a vibratory plate or roller. The result is a thermally bonded repair with no cold joints or seams.
- Cost: $150 to $400 per repair, depending on size.
- Area limit: Best for repairs up to 20 square feet each. Larger areas should be saw-cut and replaced with traditional methods.
- Timing: Complete all infrared repairs before the sealcoating crew arrives. The new asphalt needs at least 30 days to cure before sealer is applied over it.
Catch Basin and Curb Repairs
While the crack fill crew is on site, inspect all catch basins (storm drains), curb lines, and concrete headers. Settling around catch basin frames is extremely common in aging lots and creates ponding (standing water) that accelerates pavement failure. Raising or resetting catch basin frames costs $300 to $600 per basin but prevents localized deterioration that would require a $3,000+ full-depth patch within two years.
⚠️ Critical Sequence: Repairs Before Sealer
The correct project sequence is always: (1) sweeping and cleaning, (2) crack routing and filling, (3) pothole repair and patching, (4) sealcoat application (first coat, then second coat after drying), (5) re-striping. Reversing any of these steps compromises the entire project.
6. Frequency and Maintenance Plans
How often should a commercial parking lot be sealcoated? The answer depends on traffic volume, climate, and the condition of the existing pavement. But the industry consensus, backed by decades of pavement engineering data, is clear: every 2 to 3 years for commercial lots in most U.S. climates.
The 2-3 Year Sealcoat Cycle
A freshly sealcoated lot begins to show wear within 12 to 18 months in high-traffic drive lanes. By 24 months, the sealer film has thinned significantly in these areas. By 36 months, you are exposing bare asphalt to UV and moisture in the heaviest-traffic zones. Waiting longer than 3 years between applications allows oxidation to restart, negating much of the protective benefit.
For low-traffic lots (office parks with light weekday use, churches, community centers), a 3-year cycle is usually adequate. For high-traffic retail lots (grocery stores, fast food, convenience stores), a 2-year cycle provides better protection and appearance.
Annual Inspection Checklist
Between sealcoat applications, conduct an annual pavement inspection each spring. Walk the entire lot and document:
- New cracking: Mark any cracks wider than 1/4 inch for hot-pour filling.
- Potholes or base failures: Flag areas with standing water, depressions, or visible base material.
- Drainage: Check catch basins for settling or blockage. Clear debris from drain grates.
- Striping condition: Note any faded or missing lines, especially in ADA spaces and fire lanes.
- Curb damage: Check concrete curbs for cracking, displacement, or trip hazards.
- Signage: Verify that all ADA signs, directional signs, and stop signs are present and legible.
This inspection takes 30 to 60 minutes for a typical lot and should be documented with photos and notes. The resulting report drives your annual maintenance budget and helps you plan the next sealcoat cycle.
Pavement Condition Index (PCI) Scoring
For larger portfolios (10+ lots), consider implementing a formal Pavement Condition Index scoring system. PCI is a numerical rating from 0 to 100 that quantifies the overall condition of a pavement surface. It was developed by the U.S. Army Corps of Engineers and is widely used in municipal and commercial pavement management.
- PCI 85-100: Good condition. Sealcoat to maintain.
- PCI 70-84: Satisfactory. Sealcoat with crack fill.
- PCI 55-69: Fair. Significant crack filling and patching required before sealing.
- PCI 40-54: Poor. Sealcoating alone is insufficient. Consider partial overlay.
- PCI below 40: Failed. Full reconstruction or mill-and-overlay required.
A pavement management consultant can survey your portfolio and assign PCI scores for $0.02 to $0.05 per square foot. This data allows you to prioritize capital spending across multiple properties and demonstrate to ownership or the HOA board that your maintenance decisions are data-driven.
Long-Term Capital Planning
For HOA boards and commercial property managers working with annual budgets, sealcoating should be a line item in your capital reserve study. A typical 5-year maintenance plan for a 50,000-square-foot lot looks like this:
| Year | Activity | Estimated Cost |
|---|---|---|
| Year 1 | Crack fill + sealcoat (2 coats) + full re-stripe | $9,500 - $13,000 |
| Year 2 | Annual inspection + spot crack fill | $800 - $1,500 |
| Year 3 | Crack fill + sealcoat (2 coats) + touch-up striping | $8,500 - $11,000 |
| Year 4 | Annual inspection + spot crack fill + pothole repairs | $1,200 - $3,000 |
| Year 5 | Crack fill + sealcoat (2 coats) + full re-stripe + ADA audit | $10,000 - $14,000 |
Total 5-year maintenance budget: $30,000 to $42,500. Compare this to the $250,000+ cost of a mill-and-overlay. The reserve study should set aside $6,000 to $8,500 annually for this lot's pavement maintenance.
7. How to Get Quotes from Contractors
Getting accurate, comparable bids for commercial sealcoating requires a detailed scope of work. Vague specifications produce wildly different bids that are impossible to compare on an apples-to-apples basis. The lowest bid often wins not because of efficiency but because the contractor is cutting corners on material quality, surface prep, or number of coats.
Scope of Work Checklist
When soliciting bids, provide each contractor with the same written specification that includes:
- Surface preparation: Power sweeping, power blowing of cracks and edges, oil spot treatment with primer.
- Crack filling: Hot-pour rubberized crack fill for all cracks exceeding 1/4 inch in width. Specify the product name (e.g., Crafco 34854, Deery 971) or the ASTM D6690 Type II specification.
- Number of coats: Two coats minimum applied by spray (or squeegee for hand-work areas). Specify application rate (0.15 to 0.20 gallons per square yard per coat).
- Material specification: Specify the sealer product (e.g., SealMaster FlexSeal, Neyra Force) or the federal specification (RP-355e for refined tar, ASTM D6945 for asphalt emulsion). Require the contractor to provide material data sheets before work begins.
- Additives: Specify sand loading (3 to 5 pounds of silica sand per gallon) for skid resistance, especially in drive lanes and slopes. Specify polymer additive if required.
- Cure time: Minimum 24-hour cure between coats. Minimum 48-hour cure before lot reopens to traffic. Minimum 72 hours before striping.
- Striping plan: Full re-stripe of all parking stalls, ADA spaces, fire lanes, directional arrows, stop bars, and pedestrian crossings. Specify paint type (traffic-grade latex or thermoplastic).
- Traffic control: Written phasing plan with barricade layout. Contractor provides all barricades, cones, and temporary signage.
- Warranty: Minimum 1-year warranty against peeling, flaking, and premature wear under normal traffic conditions.
Red Flags in Bids
Watch for these warning signs when reviewing contractor proposals:
- No material specification: If the bid just says "sealcoat" without naming the product or spec, the contractor may use the cheapest diluted material available.
- One coat only: A single coat of sealer provides minimal protection and will wear through in 12 months in drive lanes. Always specify two coats.
- No crack fill included: If the bid does not address crack filling, the contractor is skipping the most critical step in the process.
- Same-day striping: Striping the same day as the final sealcoat guarantees paint adhesion failure. The sealer needs at least 48 hours to cure before paint is applied.
- No insurance certificate: Commercial sealcoating involves heavy equipment, heated materials, and work in public areas. Require a Certificate of Insurance showing general liability ($1 million minimum), auto liability, and workers' compensation coverage.
- Dramatically lower price: If one bid is 40% below the others, the contractor is either diluting the sealer excessively (adding more water than the manufacturer allows), applying one thin coat instead of two, or planning to skip surface prep entirely.
Insurance and Bonding Requirements
For projects over $25,000, consider requiring a performance bond. A performance bond (typically 5% to 10% of the contract value) guarantees that if the contractor abandons the project or fails to meet specifications, the bonding company will pay for completion. This is standard practice for municipal and institutional work and provides significant protection for large commercial projects.
At minimum, require the following insurance coverages:
- Commercial General Liability: $1,000,000 per occurrence, $2,000,000 aggregate
- Automobile Liability: $1,000,000 combined single limit
- Workers' Compensation: Statutory limits plus employer's liability of $500,000
- Umbrella/Excess Liability: $2,000,000 (for larger projects)
Verify that your property is listed as an "Additional Insured" on the contractor's policy before work begins. This ensures that your property's insurance is secondary, not primary, if a claim arises from the contractor's work.
8. ROI Analysis: Sealcoating vs. Doing Nothing
The return on investment for a disciplined sealcoating program is among the highest of any commercial property maintenance activity. The math is straightforward, and it holds up under scrutiny from any asset manager or finance committee.
20-Year Cost Comparison: Maintained vs. Unmaintained Lot
Consider a 50,000-square-foot parking lot (approximately 150 spaces) with a new asphalt surface installed in Year 0.
Scenario A: No Maintenance (Neglected Lot)
- Years 1-5: Surface oxidizes. Hairline cracks appear by Year 3. No treatment.
- Years 6-8: Cracks widen. Water infiltration begins undermining the base. Potholes form in drive lanes.
- Years 9-12: Alligator cracking spreads. Multiple potholes patched reactively ($500 to $1,000 each). Total reactive patching: $8,000 to $15,000.
- Year 12-15: Lot has failed. Mill-and-overlay required: $250,000 to $350,000.
- Year 15-20: Second cycle begins. Another round of neglect and eventual failure.
Total 20-year cost (neglected): $510,000 to $720,000 (two overlay cycles plus reactive patching).
Scenario B: Preventive Maintenance (Sealcoated Lot)
- Year 2: First sealcoat + crack fill + re-stripe: $10,000.
- Year 4: Second sealcoat cycle: $9,000.
- Year 6: Third sealcoat cycle: $9,500.
- Year 8: Fourth sealcoat cycle + minor pothole repairs: $11,000.
- Year 10: Fifth sealcoat cycle: $10,000.
- Year 12: Sixth sealcoat cycle + catch basin repairs: $12,000.
- Years 1-12 annual inspections and spot crack fill: $12,000 total.
- Year 14: Seventh sealcoat cycle. Lot still performing. Some drive-lane wear visible: $10,500.
- Year 16-18: Lot reaches end of extended life. Mill-and-overlay: $275,000.
- Years 18-20: Begin maintenance cycle on new surface: $20,000.
Total 20-year cost (maintained): $379,000 to $420,000 (one overlay cycle, deferred to Year 16-18, plus ongoing maintenance).
💰 Net Savings Over 20 Years
$131,000 to $300,000 saved by implementing a preventive sealcoating program versus reactive "fix it when it breaks" management. This does not account for the time value of money; when you apply a 5% discount rate, the present value savings are even larger because the major overlay expense is deferred by 4 to 6 years.
Net Present Value Calculation
For finance committees and asset managers, here is the NPV analysis using a 5% discount rate:
- Scenario A (neglected): $300,000 overlay at Year 13 = NPV of approximately $160,000. Plus $300,000 at Year 26 (extrapolated) = NPV of $84,000. Reactive patching NPV: $10,000. Total NPV: ~$254,000.
- Scenario B (maintained): $84,000 in maintenance spread over 18 years = NPV of approximately $62,000. $275,000 overlay at Year 17 = NPV of approximately $120,000. Total NPV: ~$182,000.
The preventive maintenance approach saves approximately $72,000 in present value terms over a 20-year analysis period. The longer your time horizon, the more dramatic the savings become.
9. Environmental and Regulatory Considerations
The sealcoating industry faces increasing environmental scrutiny, particularly regarding coal tar-based products. Property managers must be aware of local regulations that restrict or ban certain sealcoat formulations, as well as stormwater management requirements during application.
Coal Tar Bans
Coal tar sealants contain polycyclic aromatic hydrocarbons (PAHs), which are classified as probable carcinogens. As sealcoated surfaces wear, PAH-laden particles wash into storm drains, contaminating waterways. A growing number of jurisdictions have banned coal tar sealants:
- Washington, D.C.: Banned since 2009.
- State of Washington: Statewide ban effective 2011.
- State of Minnesota: Banned since 2014.
- Austin, Texas: Banned since 2005 (one of the first municipalities to act).
- Dane County, Wisconsin (Madison area): Banned since 2006.
- Multiple municipalities in New York, Connecticut, and Massachusetts have enacted local bans.
If your property is located in or near any of these jurisdictions, you must use asphalt emulsion-based sealers or newer biobased alternatives. Check your local environmental regulations before specifying any sealcoat product. Applying a banned product carries fines of $1,000 to $25,000 per violation, and as the property owner, you (not the contractor) bear primary liability.
Stormwater Compliance
Commercial properties in most municipalities operate under a stormwater permit (MS4 or equivalent) that requires best management practices (BMPs) to prevent pollutants from entering the storm drain system. During sealcoat application, the following BMPs are standard:
- Drain protection: All catch basin inlets within or adjacent to the work area must be protected with filter fabric or inlet guards to prevent sealer from entering the storm system.
- Overspray control: Sealer spray must not reach landscaped areas, sidewalks, or curb faces. Edge work near storm drains should be performed by squeegee, not spray.
- Cleanup: Spilled or excess sealer must be collected, not washed into drains. Used sealer containers must be disposed of according to local hazardous waste regulations (coal tar products) or recycled (asphalt emulsion containers).
- Rain contingency: Sealer must not be applied if rain is forecast within 24 hours. If unexpected rain washes uncured sealer into storm drains, the property owner must report the release to the local stormwater authority.
LEED Credit Opportunities
For properties pursuing LEED certification or recertification, sealcoating can contribute to credits in the Sustainable Sites category. Specifically:
- Heat Island Reduction (SS Credit): Sealcoating a parking lot with a high-albedo (light-colored) sealer can reduce the heat island effect. While traditional black sealcoat increases surface temperature, newer reflective sealers are available that meet the Solar Reflectance Index (SRI) requirements for this credit.
- Stormwater Management: Documenting proper stormwater BMPs during sealcoat application supports compliance narratives for stormwater credits.
Talk to your LEED consultant about whether your sealcoating specification can be adjusted to support certification goals. The incremental cost of a high-albedo sealer is typically $0.02 to $0.04 per square foot more than standard black sealer.
Runoff Containment During Application
Beyond regulatory compliance, consider the practical impact of sealcoat overspray and runoff on your property. Sealcoat residue on concrete sidewalks, building facades, and vehicle surfaces is extremely difficult to remove. Specify in your contract that the contractor is responsible for protecting all adjacent surfaces and for cleaning any overspray at their expense. This clause alone can prevent thousands of dollars in cleanup costs and tenant complaints.
10. Frequently Asked Questions
These are the questions we hear most often from property managers, HOA board members, and facility directors evaluating commercial sealcoating projects.
How long does the parking lot need to stay closed after sealcoating?
The minimum closure time is 24 hours after the final coat, assuming temperatures remain above 50°F and humidity is below 80%. In cooler or humid conditions, cure time extends to 48 hours. Striping should not begin until at least 48 to 72 hours after the final sealcoat application. With phased sealing (half the lot at a time), you can keep business operations running throughout the project.
Can you sealcoat a parking lot in cold weather?
No. Sealcoat requires ambient and surface temperatures above 50°F for proper curing. Temperatures must remain above 50°F for at least 24 hours after application. In most northern U.S. climates, the sealcoating season runs from May through September. Applying sealer in October or later risks incomplete curing, which leads to flaking, tracking (sealer sticking to tires), and premature failure.
How long does sealcoating last on a commercial lot?
A two-coat commercial sealcoat application typically provides 2 to 3 years of protection in high-traffic drive lanes and 3 to 4 years in parking stalls and low-traffic areas. The most common reapplication cycle is every 2 to 3 years. Lots with very heavy traffic (grocery stores, fast-food drive-throughs) may need reapplication every 18 to 24 months in the drive lanes.
Is sealcoating worth it for an old, cracked parking lot?
It depends on the severity. If the lot has widespread alligator cracking (interconnected cracks forming a pattern like alligator skin), the base has failed and sealcoating will not help. In this case, you need a mill-and-overlay or full-depth reconstruction. However, if the lot has linear cracks (thermal or reflective cracks) that can be filled with hot-pour crack filler, sealcoating is still beneficial and cost-effective. A qualified paving contractor can assess whether your lot is a candidate for sealcoating or needs structural repair.
What is the difference between coal tar and asphalt emulsion sealer?
Coal tar sealer is derived from coal processing and provides superior resistance to petroleum spills (oil, gasoline, diesel). It is the traditional choice for gas stations and high-traffic commercial lots. However, coal tar products contain PAHs (polycyclic aromatic hydrocarbons) and are banned in several states and municipalities. Asphalt emulsion sealer is petroleum-based, more environmentally friendly, and is the required alternative in ban areas. It provides good UV protection and water resistance but is less resistant to petroleum spills. Many modern asphalt emulsion products now include additives that improve fuel resistance.
Do I need to notify my insurance company before sealcoating?
You do not need to notify your property insurer before a routine sealcoating project. However, you should ensure that your contractor carries adequate liability insurance and that your property is named as an Additional Insured on their policy. This protects you if the contractor's work causes damage (e.g., overspray on vehicles, a worker injury, or a pedestrian slipping on uncured sealer). Keep a copy of the contractor's Certificate of Insurance in your property files.
How do I handle tenant complaints about the smell?
Coal tar sealers have a strong, distinct odor during application and for 12 to 24 hours afterward. Asphalt emulsion sealers have a milder smell. In either case, proactive communication is key. Warn tenants in your pre-project notification that there will be a temporary odor. For buildings with rooftop HVAC units, consider closing fresh air intakes during application to prevent the odor from entering the building. If a tenant operates a restaurant or food service business, schedule their building section for Friday evening or weekend application so the odor dissipates before Monday.
Can I sealcoat a concrete parking lot?
No. Sealcoating is an asphalt-specific treatment. It does not adhere to concrete surfaces. If your lot has both asphalt and concrete sections (common in older commercial properties), the concrete sections must be masked off during application. Concrete parking areas have their own maintenance requirements, including joint sealing and surface sealing with acrylic or epoxy products designed for concrete.
Should I get my lot sealcoated before selling the property?
Absolutely. A freshly sealcoated and re-striped lot is one of the highest-impact, lowest-cost improvements you can make before listing a commercial property. The dark, uniform appearance signals to buyers and appraisers that the property has been well maintained. Budget $0.15 to $0.25 per square foot for a pre-sale sealcoat and re-stripe. On a 50,000-square-foot lot, that $7,500 to $12,500 investment can reduce the buyer's deferred maintenance adjustment by $50,000 or more, translating directly into a higher sale price.
How does this calculator work for commercial lots?
Our satellite cost estimator lets you trace the exact boundary of your parking lot on satellite imagery. The tool calculates the precise area in square feet and applies current commercial sealcoating rates for your region. For residential driveway sealcoating, see our driveway sealcoating calculator. If your lot needs full repaving rather than sealcoating, use our asphalt paving calculator instead. Contractors interested in licensing this tool for their own websites can visit our contractor licensing page.